
Today we announce the release of TourDash’s latest version: TourDash 2.0! The one and only enhancer for Google Maps Business View, has evolved into a more intuitive content editor. A revolutionising way to add boundary hotspots, a more flexible advanced navigation menu and a richer hotspot editor introduces a new standard for adding and editing content within your virtual tour.
We are very curious about your experiences! Later this week we will reveal short demonstrations of the new opportunities but first we want to go ahead and give you the time to play around.
Here’s a small list of what we’ve changed in TourDash 2.0
Advanced Navigation
Reordering your navigation items has never been as easy we with TourDash 2.0. Add and label your menu items and decide what goes where, later. Now you have complete freedom to work in a manner of your choosing and still get the end result that you want.
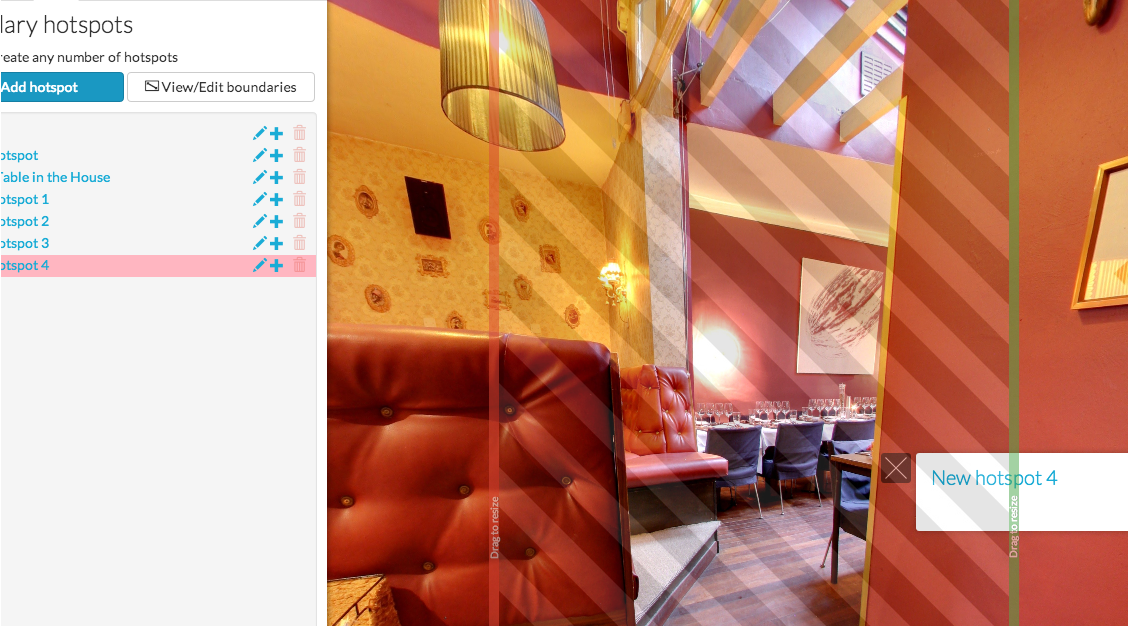
Boundary Hotspots
The process of adding Boundary Hotspots has been completely revamped.Initially it would take you up to 7 clicks to start editing your boundary hotspots, we’ve lowered that to 1. With just a single click of the button you’ll have added a boundary hotspot and can start editing it freely.
Dynamic Hotspots
The biggest change to dynamic hotspots is without a doubt how we handle the visuals, the hotspot markers/icons. You can now individually update/change the hotspot marker to suit your need. Display a separate icon depending on whether you’re showing information, want people to look at a photo or intend for them to fill in a form.
Visuals / Hotspot Markers
– We’ve updated the visuals tab, you can now change the default hotspot markers for all the dynamic hotspot
– It is also possible to assign individual hotspots markers per dynamic hotspot
Hotspot Animations
That’s right, we’ve put some attention to detail with this update. No more boring disappearing hotspot. These smooth babies slide away as you click the close button, talk about style! Left, right and ‘Houdini’-vanish, we have an animation for every hotspot position.
Rotation
Rotation is more or less the same, we’ve optimised the code and have added the ability to ‘never stop rotation’. Once enabled the default option for rotation is to ‘Stop rotation on tour hover’ opposed to ‘Stop rotation on tour controls hover’.
Hotspot Editor
We’ve completely revamped the editor for both the boundary and dynamic hotspot. In the spirit of WYSIWYG you will immediately see all of your edits live within the hotspot. No more hassle with uploading your images through separate services, simply drag and drop them inside of the editor and store all of your hotspot images inside TourDash.
Great, what come’s next :-)))
happy with the photo upload
I feel like i am into photography wksrohop now. so clear explanation. Now I know what’s the use of the hotspots that I see before I click my cam. This photography project forum is getting to the top and it is more exciting every week. Thanks so much!
Awesome Bos! looking forward to implementing them on my next tour.
very good explanation. short and sweet and clear. My nikon has 3 focus ptions but I don’t think it has a grid. sometime what I am shooting doesn’t look right in the center focal point – I move my camera to either side or up and down until I like which fucal point ‘lites up’ – manual focus doesn’t work for me My eyesight is terrible – basically have monovision – I have to rely on auto focus. thankss for the tip.